Our Process: Using 3D to Speed Up 2D
Did you know that there’s a 3D model hidden beneath most of the concept art we’ve done so far? Using 3D tools has helped us out a lot in creating concept art, and our plan is to use it extensively in the comic.
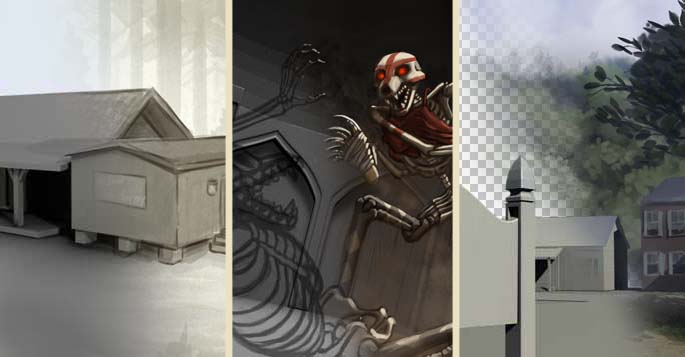
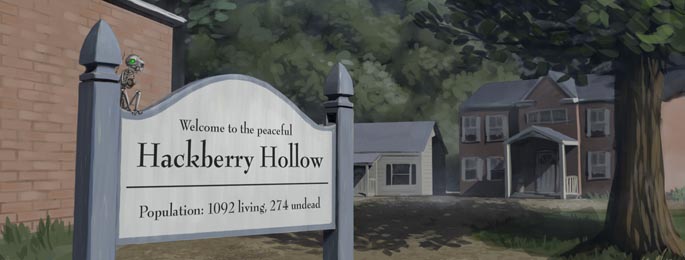
Before I decided to become an art major I dabbled in 3D modeling and animation. So naturally I started to use it to help me out with my illustration homework as soon as I could get away with it. As it turns out some professional concept artists are doing this too: making a quick 3D mock up to ensure objects have perfect perspective, maybe add a light source or two so the lighting and shadows are correct, and then paint on top of it so the 3D render doesn’t show through. Even though I can figure out the perspective and lighting on my own (See Environmental Concept Art 1, which was done without 3D software), if I need to have a detailed painting with architecture or machinery, using 3D software will save me a ton of time and the results will be better so long as I’m not a slave to the 3D render. The trick is to make sure that it doesn’t look like I used a 3D model, and painting over the entire render, or just tracing over it as a line drawing, usually achieves that, which is why no one notices until I show them the process.
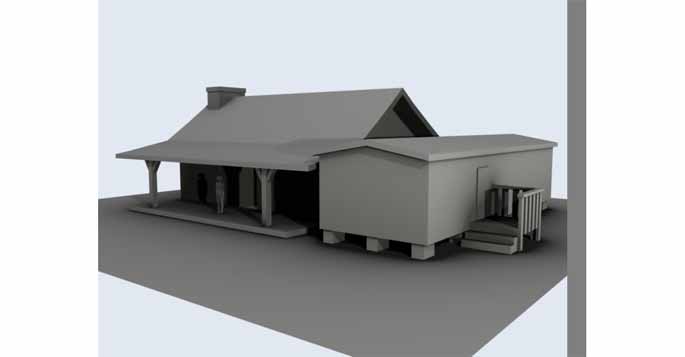
This cabin and trailer that Shane modeled are to scale. We even have a little guy on the porch that’s the same height as the main character. All three of us use Blender to help us design and mock up objects quickly if it’ll save us time, and with architecture it most certainly does. We make sure everything is to scale by having 1 Blender unit equal 1 meter across all our 3D assets, so that character placeholders and objects can be placed from scene to scene and still be to scale, like character place holders and props for example.
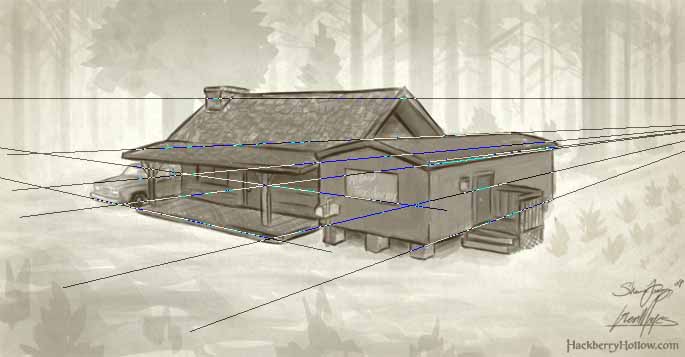
From the 3D render I can trace back the lines of the architecture to find where the vanishing points are. So if I need to add another object, like that truck for example, I can draw that in and make sure the perspective is correct the old fashioned way. I use Photoshop’s path tool to create easy to manipulate perspective lines that won’t show up when printed or exported, even if I forget to deselect the paths layer.
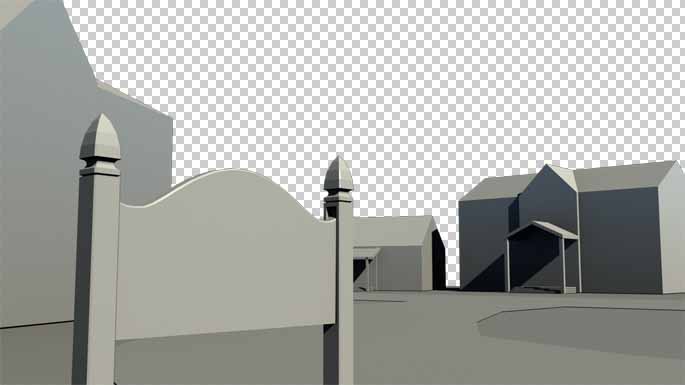
If I actually think about the color of the light sources when I create the 3D mock up, which I did in this case, all I have to do is create a new layer on top of the render, set it to multiply, and then paint with the local color of the object (the color that the object actually is) to get realistic results. What happens is that the colors will mix with the lighting that was rendered, creating the color that you would actually see given those lighting conditions.
And finally there was the Ghoul Fighting image. Because the ghouls were the focus I didn’t spend much time on the arena walls at first. I just wanted to put a place holder in there that would accurately represent the shape of being inside a circular arena, which is something that I’ve never drawn before. I’ve drawn ovals in perspective, but never an oval in perspective that wraps around the viewer.
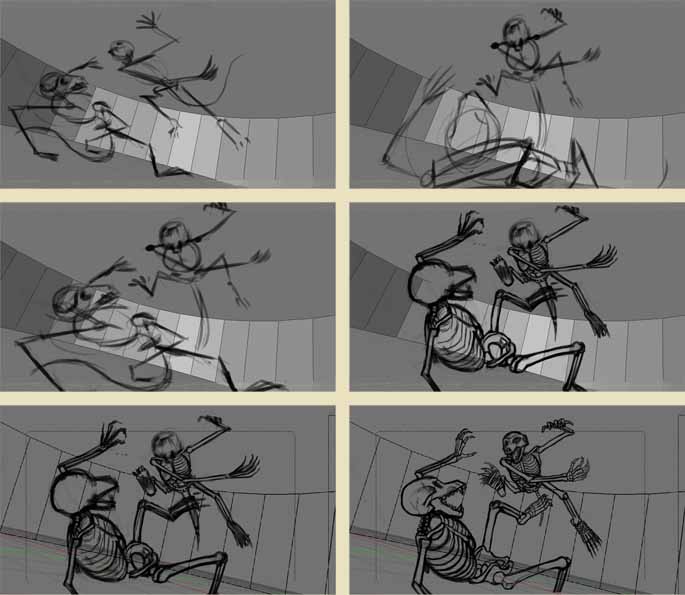
The last two sketches above are actually screen shots from Blender. I used the Photoshop sketch as a background for the 3D scene so I could change the position and rotation of camera so that the wall wouldn’t create any tangents.
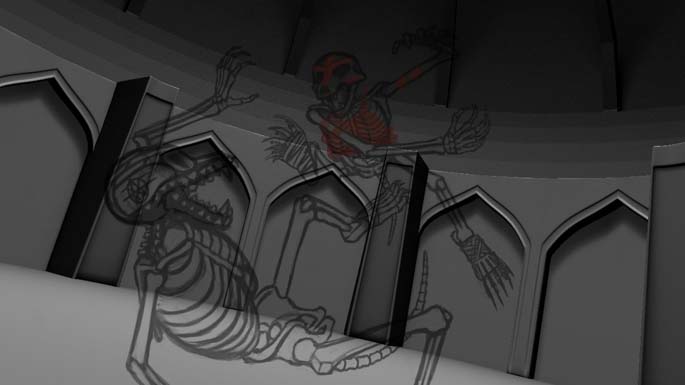
Adam had a pretty good idea of how he wanted the arena to look. So while I was working on costume designs for the ghouls I sent him my very simple 3D mock up so he could replace it with his vision of the arena. When it came back the arena looked like this. As you can see the composition didn’t change, and we were able to have two people work on the same piece of artwork at the same time.
As an added bonus, here’s the time-lapse of the painting for the Ghoul Fighting image. You can also watch it in HD. Oh, and sorry about the 3 frames per second video. Apparently the pause recording feature in Camtasia messes up time-lapse recordings.
Using rough 3D mock ups helps us out immensely when creating the concept art for the comic. So, how is this process going to work out in the actual comic? Very well in our prediction.
In comic books a scene can span multiple pages, each panel showing different angles of the same set. Many of those locations will be recurring, so we’ll have to draw it again and again from different angles. Because we can use the same 3D models to help us draw multiple panels throughout the comic, we’ll be saving ourselves a lot of time when drawing. We can also make the 3D mock ups more detailed than usual to save us even more time in the long run.
Our goal is to have stunning artwork and be able to create it in a reasonable time frame, and we think that 3D sets, vehicles, and machinery will help us out when it’s appropriate. Adam has been working on an amazing 3D set which we are planning on revealing in a few weeks. Now that you’ve seen what we’ve done with these simple 3D mock ups, once you see what Adam has been working on we think you’ll get a pretty good idea about what’s in store for the comic.

